Monday, December 31, 2012

Easy Fried Rice

Here is a super easy fried rice recipe that I use when I'm lazy and want something tasty for dinner. It takes about 30 minutes or so to whip up from start to finish. I also used my handy dandy rice cooker to cook the rice which makes my life (and yours) so much easier.


2 Cups of cooked rice (white or brown)
2-4 Tablespoons soy sauce (add as much or little as you like, but start small and add more as you go)
2 Tablespoons + 1 teaspoon vegetable oil
1 teaspoon crushed red pepper flakes, rough chop for finer pieces
1/2 cup diced carrots
1 bunch of green onions
1/2 red pepper, diced (I left this out since I am not a fan, but pretty much everyone else likes em)
1/2 cup peas (I use the frozen kind, works and tastes just as well)
Sriracha to taste
2 eggs
Sesame seeds (optional)
Also feel free to add any other proteins.. Shrimp, chicken, beef, tofu?

Makes 2 servings


1. Heat a medium sized skillet on medium, low heat. Add the first teaspoon of oil and the carrots to the skillet. Let cook until softened, about 5-8 minutes. Then add peas and red pepper flakes, cook until heated through. Remove both the carrots and peas from the skillet, set aside in a medium/large bowl for now (we'll use it again later to mix everything together.

2. Pour the remaining vegetable oil to the same skillet.

2. Add cooked rice and pour soy sauce over rice. Mix the rice to evenly incorporate the soy sauce. Cover and let cook stirring every 5 minutes or so for 10-15 minutes. While this is cooking, crack and scramble the eggs.

3. Remove rice from skillet and mix into the bowl with the veggies, add green onions.

4. Add the eggs to the skillet and constantly mix to get to desired texture. OR Alternatively, let the egg cook through, in one giant, thin egg pancake. Then cut this into narrow 1/4" strips. This works best with a non-stick pan, but you can use a regular pan, just add a little extra oil to lessen the sticky mess.

5. Combine eggs in the bowl with rice and veggies and enjoy!
You can also add more/less/different vegges as you please.


An Army of Penguins

I recently made myself an small army of penguin cookies... Here they all are pre/post baking.. These are just a few, in total there were probably close to 50+


Monday, December 24, 2012

Banana bread with a Twist

Looking for another easy recipe for the holidays? This banana bread is right up my alley. It makes a giant mound of banana bread and the toasted coconut gives it a little extra texture.

This banana bread recipe is from one of my favorite blogs, spoonforkbacon! Bonus, its the first in a three post series about banana bread. 


Chocolate Chip Coconut Banana Bread

makes one GIANT 9" loaf or five 3" loaves

Ingredients
2+1/4 cup flour
1 teaspoon baking powder
1 teaspoon baking soda
1 teaspoon cinnamon
1/2 teaspoon salt
1/4 teaspoon nutmeg
3 medium (overripe) bananas
1/2 cup (1 stick) unsalted butter, softened
1 cup sugar
2 eggs
1 teaspoon vanilla
mix-ins
3/4 cup chocolate chips
2/3 cup shredded coconut, toasted

1. Preheat oven, 375 degrees. Sprinkle coconut on a baking sheet and toast for 10-15 minutes. Keep an eye on it and toast until a golden brown. 

2. In a medium bowl, mix flour, baking powder, baking soda, salt, cinnamon, and nutmeg together. If you have a sifter, sift them together. 

3. In a small bowl, mash bananas and milk. 

4. In a large bowl, beat sugar and butter together for 2 minutes, making sure to scrape down the sides of the bowl. Add eggs, one at a time. Stir in vanilla. 

5. Stir in flour mixture until just combined. Fold in chocolate chips and coconut. 

6. Lightly grease the loaf pan and bake for 1 hour and 20 minutes, until a toothpick comes out clean when inserted into the middle of the bread.
**Make sure bread it cooked through. I baked mine for 80 minutes, passed the toothpick test and the middle still wasn't completely done. I took it out, let it cool and after an hour the middle of the loaf sank in :(

7. Allow bread to cool in the pan for 2030 minutes. Remove and allow to cool completely before slicing and serving. 


Merry Christmas! Happy Holidays!!

Thursday, December 20, 2012

Holiday time!

Hello hello again. Its been awhile, I apologize. I've had a busy fall, but I plan on getting my act together for you folks for the holidays!! So here it is, caramels. Rich, buttery caramels. If you're looking for something easy to pull together in a night and impress this recipe is perfect! All you need is a little patience and elbow grease.


Materials

Candy thermometer
Parchment paper
9x13' pan (glass or metal)
1 package waxed paper candy wrappers OR you can cut and make your own
To make your own, cut waxed or parchment paper into 4x5" squares

Ingredients

1 cup (2 sticks) unsalted butter + extra for pan
2 1/4 cups brown sugar
dash of salt
1 cup light corn syrup
1 can sweetened condensed milk
1 teaspoon vanilla


Prep:
I highly advise using parchment paper to line the pan, this makes the removal process a gazillion times easier. I have made these guys with and without it.
First, fold the parchment paper so that it wil cover the bottom and longer sides of the pan. I found it easiest to fold it down on the sides so that the 3 largest/longest are covered by the paper. (Leaving the smaller 'top' and 'bottom' sides uncovered) lightly butter the pan sans parchment paper, this helps keep the paper in place. Then put paper back in the pan and lightly butter again.

1. Heat butter on medium low heat until completely melted.
2. Add dash of salt and brown sugar. Stir throughly to ensure melted butter and sugar come together.
3. Turn up heat to medium. Be carful not to turn it up too high, you don't want to heat the mixture too quickly or it wil burn.
4. After about 5-10 minutes of stirring, add the corn syrup. Continue to stir.
5. Gradually add the condensed milk
6. Keep stirring and cook until the candy thermometer reaches 245 degrees.
This should take between 10-15 minutes, if you're still cooking turn the heat up a little at a time but be patient. Too much high heat will burn them and make them brittle.
7. As soon as the mixture reaches 245 immediately remove from heat. Stir in vanilla extract.
8. Pour hot caramel into the pan and let cool for 3+ hours. I put mine outside and it took about 2 hours in 20 degree weather to cool.
Make sure it has completely cooled before trying to remove and cut the caramels. If not, the caramels will be very sticky and difficult to cut.
9. To remove, gently run a butter knife around the outside of the pan to help loosen. Place a large cutting board on top of the pan and invert. Gently pull the parchment paper to easy the giant caramel mass onto the board.
10. Cut into long strips and then cut into what ever size pieces you desire. I cut mine into approx. one inch squares.


Enjoy!! Happy Holidays!!

Wednesday, October 31, 2012

Happy Halloween!!

Its the day before one of my favorite times of year! You see, I have an addiction.. to candy.. Its a problem. Ever since I've had a driver's license and some cash, November 1 is MY DAY to go peruse the leftover candy that is on super sale. Its delicious and completely crazy. Nuf said.
Maybe it comes from my mom's crazy idea that once I entered high school I could no longer go trick-or-treating.. I felt depraved of candy and this is how I overcompensate. Anyways, I acknowledged my problem and therefore allow myself this day of candy!
*I also feel slightly less bad because I have at least ONE other friend who would go and partake in this day with me back when we were in college together (which was not thaaaat long ago..) Yes, you know who you are.

AND lets not forget, Halloween costumes! Such a fun pain in the ass. I decided to do the run as Leonardo from TMNT and go out as Spinelli from Recess (yea!?). IF you don't know who that is you are too young. 90's cartoons were the good ol' days where you could create a tv show for kids based solely around recess shenanigans. Gold.

Have fun tonight, if you're going out and stay warm!

Tuesday, October 30, 2012

Apologies..

Its been almost a month since my last post!! I am sorry! Its been a super busy month in October! Here's a brief photo collage of my life in the last few weeks and pumpkin muffins to keep you in the fall spirit!

Splurged at Lunds today...

Two awesome finds at an estate sale, only $1 each!!

Trying to be cool and decorate the boring white walls of my apartment with little origami pyramids.. 

Also painting a nice little penguin/polar bear scene on the walls! That little chef dude is my favorite (art/idea cred goes to Chris!)

Competed in my first race!! Such a beautiful course and amazing crowd! The St. Paul community is so supportive of the runners!


Two great button-down finds at a local store, Hunt & Gather. I could (and have) spent hours pouring over their awesome finds)


Fall time means breaking out my fav oxfords, they always make me feel classy!

Baking no knead bread from a Smitten Kitchen recipe. A little dense, but not bad considering I do not own an electric mixer!!

And finally, some warm pumpkin muffins to end a very very long 12 hr work day! Nom nom


Easy pumpkin muffins, slight adaptation from Smitten Kitchen!

This recipe made 12 regular and 12 mini muffins.

1 1/2 cups flour
1 teaspoon baking powder
1 cup canned, solid packed pumpkin
1/3 cup vegetable oil
2 large eggs
1 1/2 teaspoons cinnamon plus 1/2 teaspoon
1/4 teaspoon ground ginger
1/4 teaspoon grond nutmeg
1 1/4 cup sugar, plus 1 tablespoon for topping
1/2 teaspoon baking soda
large pinch of salt


1. Place rack in the middle of the oven and preheat to 350 degrees F.

2. Whisk together pumpkin, oil, eggs, spices, 1 1/4 cups sugar, baking soda and salt in a large bowl until smooth. Then add flour and mix until just combined. 

3. In a small bowl mix together 1 tablespoon and 1/2 teaspoon cinnamon.

4. Fill muffin tins until 3/4 full, and top with cinnamon sugar.

5. Bake for 25-30 minutes, until a toothpick inserted into the middle comes out clean.

6. Let cool for a few minutes until removing and putting on a cooling rack. Or if pressed for space (like me) gently tilt muffins on their sides in the pan to cool (as seen above). 

Saturday, October 6, 2012

Fall is here!!

Fall is here! (to stay I hope!). The thought of this excites me sooo much! So many hours with my fuzzy blanket, good beer and book in hand to look forward to. And what better to enjoy than chocolate brownie cookies! All ooey, gooey and chewy, get a good book, big glass of milk and a plateful of these guys!


Chocolate Brownie Cookies


Makes approx 26 cookies

8 ounces bittersweet chocolate (chopped or in chips)
3 Tablespoons (1 1/2 ounces) butter
1 cup sugar
3 large eggs
1 teaspoon espresso powder
1 teaspoon vanilla
1 cup all­purpose flour
1/4 teaspoon baking powder
1/4 teaspoons salt

1. In a double boiler, or in the microwave, slowly melt together the chocolate and butter. Continue stirring until chocolate and butter are both melted and smooth.
*If using the microwave, heat in 10-15 second increments to avoid burning the chocolate. After each little zap in the microwave, take out the chocolate/butter mixture and give it a good stir. As soon as the butter has melted stop microwaving. Keep stirring until the chocolate has melted too.


2. In large bowl, beat together the sugar and eggs until throughly combined. Add the melty chocolate mixture and stir until incorporated.

3. In the same bowl, add the rest of the ingredients. Then pop the dough in the fridge for an hour or so until it is firm.


4. Heat oven to 325 degrees F. Drop tablespoons of the dough onto lightly greased or parchment paper lined cookie sheets.

5. Bake for 10-12 minutes, just until the tops have begun to crack. Remove and let cool. Cookies keep up to 4-5 days, stored in an airtight container at room temp.


Friday, October 5, 2012

Mexican Pizza!

Monday was a rough day. Chris hyperextended his knee pretty badly and I managed to forget everything I needed for work (breakfast, lunch, work appropriate clothing and shoes.) Twas a long, hungry day.

In my experience, long days are best ended with a great meal. After much debate and aimless wandering through the grocery store,we decided to get creative and make something delicious to make up for the crappy day. Mexican inspired pizza. Here's what we came home with with:
sweet corn tamales
fresh chorizo
queso fresco
mexican sour cream
salsa verde
whole wheat pizza dough

Here's what came of that:
Rolling out the dough...


After it was baked, topping it off with the salsa verde and mexican sour cream: (check out that stache action!)

 That photo bombing rooster.. He has no shame!


Baked to perfection, this pizza must've weighed about 20 pounds! It was delicious, but a very very very dense and filling pizza. 

Sunday, September 23, 2012

Busy Bee!

Two posts in one week?!?! Holy mackrel!

Today I proudly present, Buttermilk Cake. I had some buttermilk leftover from the Cinnamon Apple Cake and wanted to use it up. I always feel bad not ever using up all the buttermilk. Its such a waste, but it gets pushed to the back of the fridge and I forget about it.
Well, not this time! I set out to find a recipe worthy of the remainder of this milk.

Also, I just went to go see these guys play a free show at the Cedar: The MOVITS!
Totally worth going out on a work night! Didn't understand most of the show though as it was all in Swedish, haha. These guys put on a great, energetic show! They danced and jumped all over the stage, it was great.


Tanyard Farm Buttermilk Cake


Cake:
1/2 cup (1 stick) unsalted butter
2 cups light brown sugar
2 large eggs
2 cups buttermilk
2 teaspoons vanilla extract
2 teaspoons baking soda
3/4 teaspoon salt
3 cups flour

**The original recipe calls for King Arthus Unbleached All-Purpose Flour, which I shamefully do not own King Arthur Flour (its on my wishlist) so regular flour will still yield tasty results!

Topping:
6 tablespoons melted butter
1 cup light brown sugar
1/4 milk
2/3 to 1 cup diced pecans

This recipe is for a 9x13" pan, but since I did not need cake for 24 people, I simply halved the recipe when I made it and put it in a 8' cake round. If you are going to do the same, I suggest filling the pan about halfway full, leaving at least a cup of batter still in the bowl (to be used for 2-3 cupcakes or a small/mini loaf). The amount of batter this made filled my poor pan to the brim and looked on the verge of overflowing.

If making the full recipe, lightly great a 9x13" cake pan.
*For smaller cakes, follow the same instructions for whatever size pan(s) you are using.


Preheat the oven to 350 degrees F.

1. Cream together the butter and brown sugar until smooth (3-4 minutes).

2. Add the eggs, and stir until completely combined.

3. Stir in buttermilk and vanilla extract.

4. Add baking soda, salt and flour to wet ingredients, beating until throughly combined and smooth.

5. Pour into prepared pan(s) and bake. I highly recommend putting the cake pan on a baking sheet, just in case things get a little messy.

6. Bake the cake for 35-40 minutes (mine took almost 45 since it was so deep and the batter is quite dense). Towards the end of baking time, prepare the gooey caramel-like topping.

7. Heat a small sauce pan on medium heat, adding in butter and sugar. Stir to combine. Once the sugar is dissolved, add milk, pecans and salt. Cook for 3-4 minutes.

8. Remove cake from the oven and spoon topping over the cake.
**The middle of my cake sunk in completely when I did this. Fear not! It creates a soft, gooey middle for the cake! You'll thank me later!

9. Return the cake to the oven for 10-15 more minutes, until fully cooked. Test with a butter knife or toothpick until done. Mine took closer to 15 minutes while the original recipe says 10.

10. Let cool for 5-10 minutes then dig in! Cake is still good when cooled to room temperature.
Store covered/in an air tight container for up to 3-4 days.
Serving suggestions: scoop of cinnamon or vanilla ice cream on top while still hot and extra gooey!


Wednesday, September 19, 2012

Breakfast for Dinner and Cinnamon Apple Cake!

Breakfast food is my absolute favorite kind of food genre. Breakfast for breakfast, breakfast for lunch, breakfast for dinner. Bring it on, I'm always game! I'm also a huge lover of fall. HUGE. The weather is beautiful and I just want to eat apples and cinnamon alllll the time. And anything with nutmeg, ginger and allspice. Which reminds me, I've got to head to Starbucks at some point and pick me up a Pumpkin Spice Latte. It's such a guilty pleasure of mine. yum

So to kick this off right, I'm making my own version of a frittata/baked egg dish. Its more omlett/quiche hybrid than baked eggs. They need little prep and attention and turn out to be an impressive breakfast/lunch/dinner item.

There are potatoes, rosemary, thyme, cheese, and arugula in this one. You can play around with it a lot too, which is another thing I love about making this dish. I usually follow this equation loosely (it might look like a lot, but it's really not. I promise):

potatoes (optional) + protein (optional) + greens + veggies + herbs + cheese = frittata/quiche filling

Proteins: bacon, sausage or ham
Greens: arugula, spinach, mixed greens
Veggies: onion, peppers, green onions
Herbs: chives, rosemary, thyme, basil, sage, dill
Cheese: asiago, parmesan, swiss, cheddar, mozzarella
-These are just a few ideas

 Basically cook up your 'filling' items, throw on the greens, pour in eggs, let cook briefly on the stove top then pop in the oven until done. Seriously, delicious and easy. Also, if you don't plan on eating the entire thing, quiche and frittatas keep well in the freezer for a bit.

Potato and Arugula Frittata


1 medium potato
1 teaspoon olive oil
1 teaspoon chopped rosemary
1 teaspoon chopped thyme
1/2 cup arugula (you can use more, but this is all I had left in the fridge)
7-8 eggs (depending on the size of your skillet)
splash of milk
1/2 cup shredded asiago cheese
1/4 cup shredded parmesan cheese


1. Dice potato into smallish cubes, fork size for easier eating. Put into an oven proof skillet with the olive oil. Cook for 10-15 minutes until done. If you're unsure, stick one of the cubes with a fork. The fork should easily spear the potato, if it doesn't the potatoes aren't done.
**I used a non-stick skillet, which makes it super easy to get out of the pan later on.

2. While these are cooking, beat the eggs and milk together in medium sized bowl. Add the herbs and half the cheese to this mixture.
Preheat the oven to 400 degrees.

3. When the potatoes are done, sprinkle your choice of greens on to. In my case, the arugula. Then pour the egg mixture on top and let cook for 5 minutes, until you can see the edges of the egg start to set. Then sprinkle the remainder of the cheese on top and put into the oven.

4. Let this cook for 25-30 minutes. You'll know when its done when the eggs are set. To test this just grab the skillet handle (with oven mitt on!) and give the pan a little shake. If the middle still seems too liquid then continue to let it cook, checking every 5-7 minutes until done.

5. When cooked through, pull skilled out of the oven. Slide the frittata onto a large plate. If you want to, put a plate of equal or large size over the plate with the frittata and turn upside down if you prefer the other side up. Slice into 6-8 pieces and enjoy!


**If you have leftovers, let them cool completely and then freeze. These will keep in the freezer for a couple weeks. Just take them out and microwave for 1 minute or so.


Now onto dessert! This Cinnamon Apple Cake seemed appropriate as the weather is finally starting to feel like fall! And I wanted to use some of the apples I got from the farmer's market on Saturday.
There's something so peaceful and relaxing about the farmers market. All that fresh produce and food! And the dogs, lets not forget about all those dogs that are allowed to come and mingle with everyone!!
It just makes me feel good.
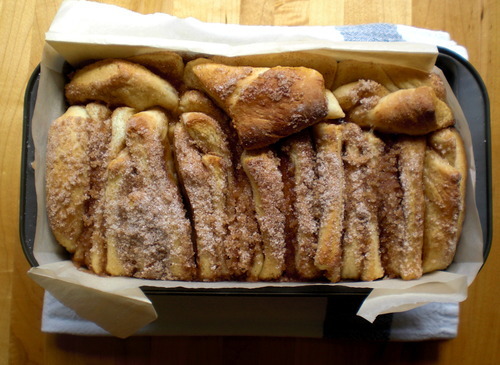
Cinnamon Apple Cake


2 cups flour
1 teaspoon baking soda
1 teaspoon baking powder
1 tablespoon + 1 teaspoon cinnamon
1/2 teaspoon salt
1/4 teaspoon nutmeg
dash of black pepper

1 cup brown sugar
8 tablespoons (1 stick) unsalted butter, at room temperature
2 eggs at room temperature
1/2 cup buttermilk
2 cups peeled and diced apple

optional topping:
buttermilk for brushing
cinnamon sugar (4 teaspoons sugar and 1 teaspoon cinnamon)

**The original recipe makes 8 little cakes, but since I don't have little cake pans I used 4 mini loaf pans instead. This recipe makes enough to fill a 9'x9' or standard bread pan. Just make sure to either grease/line with parchment paper for easy removal later. I made two with paper and two just grease, both came out just fine.

Preheat the oven to 350 degrees F
1. Grease or line with parchment paper, your pan(s) of choice and set aside.

2. Whisk together flour, baking powder, baking soda, cinnamon, salt, nutmeg and pepper in a medium mixing bowl.

3. Cream butter and sugar in a large mixing bowl until fluffy and light, approximately 5 minutes depending on method of mixing. This can be done with stand mixer, hand-held mixer or a wooden spoon and some elbow grease.

4. Beat eggs in, one at a time until completely incorporated.

5. Alternate adding in buttermilk and dry ingredients. First add half of flour mixture, mix, then half of the buttermilk, mix and repeat. Then fold in the diced apples.

6. Fill your pan(s) about 3/4 full. Smooth over the tops. If using topping, brush with buttermilk and sprinkle cinnamon sugar over the top.
*I opted out of this part, and the cake is just as delicious.

7. Bake for 30-40 minutes, rotating pans about halfway through for even cooking. Baking time might vary, just make sure a toothpick or knife comes out clean when inserted into the middle of the cake.
Remove from oven and let cool for 5-10 minute before digging in.

For storage: let cakes cool completely to room temperature then store in an air-tight container for several days.


Saturday, September 8, 2012

As Promised..

What a week it has been! Busy busy at work, flat tires, Spring Roll Social and Monster Dash training! The weather has also been super warm for September in Minnesota, BUT last night there was a bit of chill in the air!! This means the silly heat wave is finally over, over and done. And fall is coming! Wonderful crisp air, apples, cinnamon, and warm fluffy blankets! *sigh*

Meanwhile, get your weekend started off right with some cookies! Because whats better than fresh baked cookies for the weekend?!

White Chocolate Cappuccino Cookies!


Ingredients:
1 cup (2 sticks) of unsalted butter, softened
3/4 cup brown sugar
3/4 cup granulated sugar
1 egg
1 egg yolk
2 teaspoons vanilla extract
2 1/4 cups flour
1 teaspoon baking soda
3 tablespoons instant espresso powder or coffee powder
1 cup white chocolate chips

*For expresso powder I would advise using one with a larger 'grain'. Mine was a very fine grain and so the flavor was good, but a little less intense that desirable. As seen in the above picture, it lead to an overall darker cookie, instead of one that was lighter and flecked with nuggets of coffee flavor. 

1. In a medium bowl mix together flour, baking soda, salt, and espresso powder.

2. In a large bowl mix together butter and sugars until completely combined and fluffy. (**This can be done with or without a stand mixer. I don't have one so a little elbow grease and patience works just fine!) This will take about 5 to 7 minutes by hand, and closer to 5 with a stand mixer. Remember to stop and scrape down the sides of the bowl every few minutes. 
Next add the eggs and mix for another 5 minutes until incorporated. Add vanilla and repeat. 

3. When all of this is fully mixed, add in ALL the dry ingredients at once. Mix until just combined and no pockets of flour remain. Fold in the white chocolate chips!

4. Place dough, covered, in the fridge for 45-60 minutes. 

5. Pre-heat oven to 350 degrees F. 
Spoon cookie dough in heaping tablespoons onto a parchment paper lined cookie sheet. If you don't have parchment paper, don't sweat it. It just makes for a good non-stick surface and super easy clean up.

6. Bake cookies for 12 to 15 minutes. (Mine took closer to 15 minutes)


Tip: For those who don't want or need all 2 dozen cookies at once, take cookie dough out after its 45 minute nap in the fridge and roll into small walnut sized balls. Place in a freezer bag and pop them out whenever you need a little sweet snack!

Thursday, September 6, 2012

Chocolate!


Sorry for the gap between posts but I had to take a small break due to a mysterious summer cold last week...

BUT, before the cold, there was the joyous discovery as we were wandering through the grocery store last week. Chocolate on sale!! Oh joy!
The results of my score:


Total cost was a whopping $10!! For 8 perfectly good, quality bars of chocolate.

NOW, what to do with them all... Brownies? Chocolate cake? Cookies? Hmmmm...
Suggestions needed please!


AND..
Happy (late) Labor Day weekend! If you had to work, I've been in your shoes, I hope you had a moment to relax and put your feet up. And if you were lucky duck, and did not have work for a whole 3 days, I hope you got outside and enjoyed the marvelous weather!
I took a mini vacation up to Duluth to go camping and sailing with my boyfriend and family. It was a beautiful weekend with awesome people  :)


Up Next: White Chocolate Cappuccino Cookies

Sunday, August 26, 2012

State Fair!


Also known as the Great Minnesota Get together. What a wonderful day with the family, we spent about 7 hours at the fair and maybe saw half of the exhibits and shows going on.

For those unfamiliar with this great event, you are missing out. Everything imaginable on a stick, fried and usually covered in chocolate. It is the second largest state fair in the U.S. (2nd to Texas), and averages a few hundred thousand visitors a day over 12 days. There are tons of things to do everyday and an endless stream of interesting people to watch! 

Foods tried (and shared with my parents):
Chocolate Milkshake- from the Dairy building
Pronto Pups
Asian style carnitas taco- Food building


State Fair Taffy, which turned out to be too soft and lacking flavor. So we went back to our ol' standard
Salt Water Taffy
Ole's Cannolis


Paul Bunyan Bar (w/ waaay too many chocolate sprinkles)
Fresh French Fries

Here's me totally hamming it up on the Spamville Throne!


 And I was super pumped to find this t-shirt from 'I Like You', a local Minneapolis store located up NE. 


And so to make up for all this junk food, Kale Chips and a run (but you don't have to do that last part, thats just for me)! Super easy and crunchy little chips that can make me feel better about all that food from yesterday. 


Kale Chips:


1 Bunch of Kale
1-2 Tbsp Olive oil
Sea Salt for sprinkling

1. Pre-heat oven to 300 degrees
2. Wash cut de-stem kale, get out all the thick stalky parts and cut into large pieces.
3. Toss kale pieces in olive oil
4. Lay on a cookie sheet lined with parchment paper and sprinkle sea salt on top.
5. Put in the oven for 20-25 minutes, until crisp! (It took me a little over 20 minutes to get them all crispy). Make sure if not all of them are done just pop those ones back in the oven. I made the mistake of being over excited and not letting all of them cook and ended up with wilted/ chewy kale (bleck).
BUT other than that small oversight on my part, these turned out deliciously!

Up next something with: Bananas!

Monday, August 20, 2012

Firsts!


The first post, nerves and jitters all around.
Hopefully this blog will only get better with age, time and experience. It is a big commitment, especially for someone who forgets to take pictures. (And who wants to look at a food blog without the pictures?!) I like to think of them as never ending picture books for cooks and food enthusiasts. 
But now down to the important stuff..
For the first post: Pull Apart Cinnamon Bread! nom nom
This recipe is from Joy the Baker, if you’re not familiar with her, I highly suggest checking her out here!

CINNAMON SUGAR PULL APART BREAD:
For the Dough:
3 cups all-purpose flour
1/4 cup granulated sugar
2 1/4 teaspoons (1 envelope) active dry yeast
1/2 teaspoon salt
2 ounces unsalted butter
1/3 cup whole milk (I used 2%)
1/4 cup water
2 large eggs, at room temperature
1 teaspoon pure vanilla extract

For the Filling:
1 cup granulated sugar
2 teaspoons ground cinnamon
1/2 teaspoon fresh ground nutmeg
2 ounces unsalted butter, melted until browned

1. In a large mixing bowl whisk together 2 cups flour, sugar, yeast, and salt. Set aside.

2. Whisk together eggs and set aside.

3. In a small saucepan, melt together milk and butter until butter has just melted. Remove from the heat and add water and vanilla extract. Let mixture stand for a minute or two, or until the mixture registers 115 to 125 degrees F. (I just eyeballed this, since I don’t have a thermometer). 
Add the milk mixture into the dry ingredients and mix. Add the eggs and stir the mixture until the eggs are incorporated into the batter. The eggs will feel soupy and the dough will look very wet, but keep stirring. Add the remaining 3/4 cup of flour and stir for about 2 minutes. The mixture will be sticky. That’s just right.

4. Place the dough in a large, greased bowl. Cover with a clean kitchen towel.  Place in a warm space and allow to rest until doubled in size, about 1 hour. (Since my kitchen is usually on the cool side, I warm up my oven for a few minutes then turn it off and place the covered dough inside with the oven door cracked a bit) 
* For use in the morning, dough can be risen until doubled in size, then refrigerated overnight.  If you’re using this method, just let the dough rest on the counter for 30 minutes before following the roll-out directions below.

5. While the dough rises, whisk together the sugar, cinnamon and nutmeg for the filling. Set aside. Melt 2 ounces of butter until browned.  Set aside.  Grease and flour a 9x5x3-inch loaf pan OR line with a piece of parchment paper for a less messy/buttery situation. Set that aside too.

6. Deflate the risen dough and knead about 2 tablespoons of flour into the dough. Cover with a clean kitchen towel and let rest for 5 minutes. On a lightly floured work surface, use a rolling pin to roll the dough out. The dough should be 12-inches tall and about 20-inches long. If you can’t get the dough to 20-inches long… that’s okay.  Just roll it as large as the dough will go. Use a pastry brush to spread melted butter across all of the dough. Sprinkle with all of the sugar and cinnamon mixture.  It might seem like a lot of sugar. (But in the end it is just the right amount!!)
 
7. Slice the dough vertically, into six equal-sized strips. Stack the strips on top of one another and slice the stack into six equal slices once again. You’ll have six stacks of six squares. Layer the dough squares in the loaf pan like a flip-book. Place a kitchen towel over the loaf pan and allow in a warm place for 30 to 45 minutes or until almost doubled in size.

8. Place a rack in the center of the oven and preheat to 350 degrees F. Place loaf in the oven and bake for 30 to 35 minutes, until the top is very golden brown. The top may be lightly browned, but the center may still be raw. A nice, dark, golden brown will ensure that the center is cooked as well.

9. Remove from the oven and allow to rest for 20 to 30 minutes.  Run a butter knife around the edges of the pan to loosen the bread and invert onto a clean board OR if using parchment paper, simply take the bread out.  Serve warm with coffee or tea.
Bread is best served the day it’s made, but it can also we wrapped and kept at room temperature for up to 2 days!
**May I also suggest playing around with the spices and adding little nuggets of fruit? Maybe some apple slices or raisins?